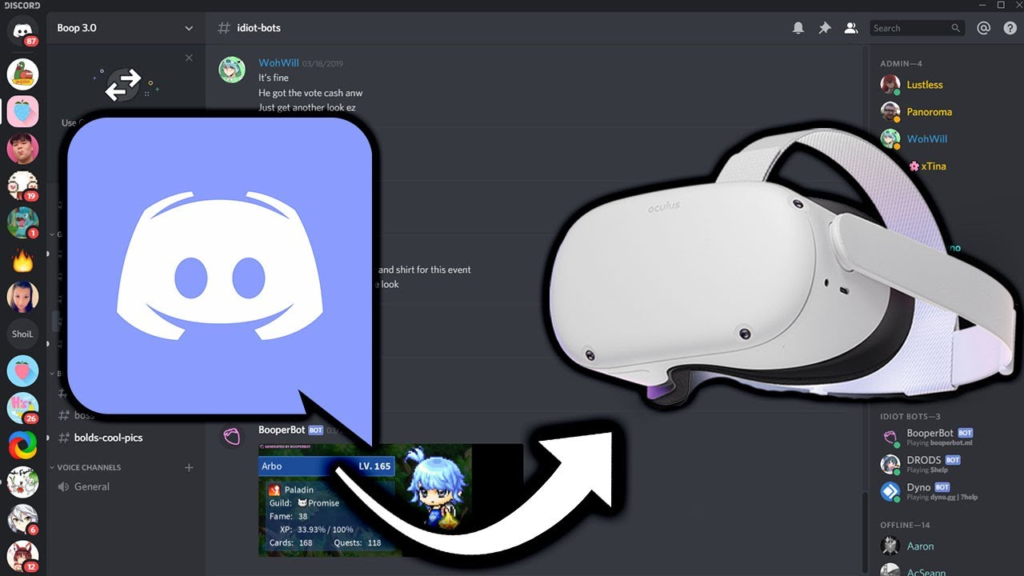
Welcome to our step-by-step guide on downloading Discord for Oculus Quest 2, all without needing a PC. Whether you want to chat with friends during your virtual adventures or stay connected to your gaming community, Discord is a popular choice. The Oculus Quest 2, with its standalone VR capabilities, enables you to dive into immersive experiences effortlessly. However, installing apps not directly available on the Oculus Store can seem challenging. This guide simplifies the process, ensuring you can seamlessly integrate your social experience into your VR gameplay. Let’s get started on enhancing your Oculus Quest 2 with Discord connectivity!
Solution 1: Using the Oculus Browser
Introduction
In our digitally connected world, accessing social platforms like Discord through various devices has become essential ”even in virtual reality (VR). For users of the Oculus Quest 2, integrating their social experiences within VR can greatly enhance their overall engagement. Although it may sound complex, using the Oculus Browser to access Discord’s web client is a straightforward process that can be accomplished without any additional hardware like a PC.
The Oculus Browser is a built-in feature of your Oculus Quest 2 headset, designed to bring you the vast world of the internet within the engaging VR environment. This means you can use it to navigate to many websites, just as you would on a traditional computer, but within the immersive confines of virtual reality. Discord, known for its robust community and communication features, can also be accessed through this browser via its web client. This method allows you to chat with friends, join communities, and participate in text and voice channels right from your headset.
Steps
- Power on Your Oculus Quest 2: Press the power button on your headset to turn it on and put it on your head.
- Access the Oculus Browser: On the Oculus home screen, look for and select the “Browser” icon. This will launch the Oculus Browser application where you can browse the internet in VR.
- Navigate to Discord: Using the virtual keyboard within the Browser, type in the Discord web client URL: “https://discord.com/login” and hit enter. Wait for the web page to load.
- Sign In to Your Discord Account: Once the Discord login page is displayed, enter your account credentials ”your email (or phone number) and password. If you’re new to Discord, there is an option to create an account here as well.
- Navigate the Discord Web Client: Upon successful login, you’ll be taken to the Discord app interface. You can now access your channels, direct messages, and available servers. Interaction with the interface is performed using the Oculus controllers.
- Join a Voice or Text Channel: Point your controller at the voice or text channel you wish to join and click on it. For voice channels, make sure your headset’s microphone is enabled.
- Adjust Settings If Necessary: Access user settings by clicking on the gear icon next to your username in the bottom-left corner of the screen. Here you can adjust input and output devices, notifications, and other user settings.
- Exit Oculus Browser: When you’re finished with Discord, simply press the Oculus button on your right controller to return to the home screen or close the browser window.
Summary
Using the Oculus Browser to access Discord is a relatively simple process that brings the power of this popular communication platform into your Oculus Quest 2 VR experience. This solution allows you to stay connected with your gaming friends and communities while immersed in your VR activities. It’s convenient, doesn’t require extra equipment, and leverages something that’s already built into your device.
However, there are potential downsides, such as the fact that the web client might not support all the features of the dedicated Discord app, and navigating in a browser with controllers may not be as seamless as with a mouse and keyboard. Additionally, some users may find typing with a virtual keyboard cumbersome and the overall experience may feel less intuitive compared to the full Discord app on PC or mobile.
Remember, while this solution integrates social functionalities into your VR headset, it’s still important to be mindful of privacy and security. Always log out from your Discord account after each session to keep your information safe.
Through SideQuest VR
Introduction
Discord is a popular communication platform extensively used by gamers and virtual communities. While Oculus Quest 2 does not have an official Discord application, you can somewhat circumvent this limitation using an application called SideQuest VR. SideQuest VR is a tool that lets you sideload content—installing applications not available on the Oculus Store—onto your Oculus Quest 2. This process requires a little bit of setup, but it isn’t overly complicated. By sideloading, you can obtain a version of Discord (APK) initially intended for Android devices that can function on your Oculus Quest 2. Keep in mind that sideloading non-official applications might pose some risks or result in an experience that’s not fully optimized for your device, so proceed with caution and understand the potential risks involved.
Steps
- Enable Developer Mode on your Oculus Quest 2:
- To install apps not listed in the Oculus Store, you must enable Developer Mode on your headset. This is done by creating a developer account on the Oculus website, navigating to the ‘Settings”tab in the Oculus app on your smartphone, finding your headset, and toggling the switch for Developer Mode.
- Install SideQuest on a Supporting Device:
- While the goal is to use Discord without a PC, initially, you’ll need one to install SideQuest. Head over to SideQuest’s website on your PC, download the SideQuest installer for your operating system, and install the application following the on-screen instructions.
- Connect your Oculus Quest 2 to your PC:
- Use a USB cable to connect your Oculus Quest 2 to your computer. Allow USB debugging if prompted on your headset’s display.
- Locate and Download a Discord APK:
- You will need to find a compatible version of Discord’s APK file—which is the installation file used by Android devices. These can be found on APK websites. Ensure you are using a reputable source to avoid malware.
- Install Discord APK Using SideQuest:
- Open SideQuest on your PC with Oculus Quest 2 connected. Drag and drop the Discord APK file onto the SideQuest window to install it. If everything goes correctly, SideQuest will sideload the APK onto your Oculus Quest 2.
- Launching Discord:
- Once installation is complete, disconnect the Oculus Quest 2 from your PC. Within your headset, navigate to the ‘Library,’ click on the dots at the top right to filter software selection, and under ‘Unknown Sources,’ you should see Discord. Wait as it initializes for the first time.
- Log In to Discord:
- You will launch what appears to be a mobile version of Discord. Proceed to log in using your Discord credentials, and you should have access to your account, friends, and servers, keeping in mind that some functionalities may be limited.
Summary
Sideloading via SideQuest VR enables you to use Discord on Oculus Quest 2 to a certain degree. This can enhance your social experience in VR by staying connected with friends and communities that primarily use Discord for communication. While this can be advantageous, especially for close-knit gaming groups, this workaround does have its downsides. Sideloading Discord in this way may not provide the full range of features available on the official mobile or desktop app, and the user interface may not be fully optimized for a VR experience. Additionally, since this is a non-official solution, there is always a slight risk to device security and stability. Lastly, ensure that you only download APKs from reputable sites to prevent any potential security issues. Despite these caveats, for diverse communication outside of Oculus-native apps, this method can be a helpful alternative.
Solution 3: Via Oculus Store’s Browser App
Introduction
For individuals seeking to use Discord on their Oculus Quest 2 without the help of a PC, one of the solutions is to access it via an official browser application available on the Oculus Store. The Oculus Store hosts several browser apps designed to provide users with a seamless internet surfing experience within the VR environment. By using these dedicated browsers, you can access web-based services like Discord’s web version, allowing you to chat and possibly utilize some of Discord’s features directly through your headset. Let’s dive into how you can get started.
Steps
- Power On Your Oculus Quest 2: Put on your Oculus Quest 2 headset and ensure it’s powered on and properly set up.
- Access the Oculus Store: From your Oculus home screen, look for the “Store” icon and select it. The Store is where you can download games and apps for your headset.
- Search for Browser Apps: Once you’re in the Oculus Store, use the search function to look for browser applications. Type in keywords like “browser” or “web” to find available options.
- Choose and Install a Browser App: Review the list of browser apps and select one that you wish to use. Popular choices could include applications like the “Oculus Browser” or any other highly-rated browser that’s compatible with your device. Click the “Get” or “Download” button to install the application onto your Oculus Quest 2.
- Launch the Browser App: After the installation is complete, go to your Oculus home screen and find the newly installed browser app. Then, select it to launch the web browser.
- Navigate to Discord: Within the browser app, use the search bar or URL field to navigate to the official Discord website by typing in https://www.discord.com. You will be directed to the web version of Discord where you can interact with your friends and communities.
- Login or Sign Up: If you already have a Discord account, select the “Login” button and enter your credentials to access your account. If you do not have a Discord account, you can easily sign up for one directly through the browser.
- Use Discord Features: Once logged in, you’ll be able to access various Discord features such as joining servers, participating in text chats, and possibly some limited voice chat functionality depending on the capabilities of your browser app.
- Adjust Settings as Needed: You might need to adjust some settings within the browser app or the Discord web client to optimize your experience. This could include enabling or disabling certain features to ensure they work correctly within the VR environment.
- Exit or Logout: When you’re finished using Discord, you can log out by clicking on your profile picture and selecting “Logout” To exit the browser, simply close the app like you would any other on your Oculus Quest 2.
Summary
Utilizing the browser apps within the Oculus Store to access Discord’s web version offers a straightforward solution for those without a PC. This method brings the benefits of allowing communication and community engagement within a VR space, providing an immersive and integrated virtual social experience.
However, there may be some potential downsides to consider. First, the web version of Discord may not provide all the functionality available on the desktop or mobile app versions, which could limit your experience. Also, navigating a browser and typing in VR can be less convenient than using a traditional keyboard and mouse or a touchscreen.
Despite these limitations, for users looking to interact with their Discord communities without leaving their VR environment or resorting to complex setups with a PC, this solution can be a valuable and accessible option.
Solution 4: Link Sharing via Mobile
Introduction
With the Oculus Quest 2, there is an innovative way to access Discord without downloading an app or using a PC. This involves using your mobile device to interact with Discord, then sharing relevant content directly to your Oculus Quest 2. Although this method does not provide a full Discord application experience within your VR headset, it allows for quick sharing of links, images, or text that you may need to access while in VR. This can be particularly useful for occasions when you need to view messages quickly or join calls without leaving the immersive experience.
Steps
Accessing Discord on Mobile:
- Install the Discord App: If you don’t already have Discord installed on your smartphone, open the App Store (iOS) or Google Play Store (Android), search for Discord, and download the app.
- Log in to Discord: Open the Discord app on your phone and sign in with your account credentials. If you don’t have an account, you’ll need to create one to proceed.
Sharing Links to Oculus Quest 2:
- Open the Oculus App: On your mobile device, ensure you have the Oculus app installed. Launch the app and log in to your Oculus Quest 2 account.
- Connect Your Smartphone and Oculus Quest 2: Make sure your Oculus Quest 2 headset is turned on and connected to the same Wi-Fi network as your smartphone.
- Find Content to Share: Go back to your Discord mobile app and navigate to the content (e.g., a message, image, or link) you wish to share.
- Share to Oculus: Use the share feature (usually represented by an icon with an arrow or connected dots) within the Discord app and select the Oculus app as the sharing destination.
- Viewing the Shared Content in VR: Put on your Oculus Quest 2 headset, and you should receive a notification or find the shared content within the appropriate section of the Oculus interface. Look for alerts, notifications, or a shared content area within your Oculus dashboard.
- Interact with the Content: Open the shared content from Discord in your Oculus Quest 2’s browser or relevant app and interact with it as needed. For example, if it’s a link to a voice channel, you can join it and participate in the conversation.
Summary
The benefit of using this method is its simplicity and the fact that it does not require any unauthorized software installations, which maintains the security and integrity of your Oculus Quest 2 system. It’s also a quick way to access small but important pieces of information or jump into voice channels directly from Discord to your VR experience. However, it’s important to note that this method does not provide full Discord functionality within the Oculus Quest 2, and some features like push-to-talk or extensive text chatting might not translate well into VR. This workaround is best suited for users who occasionally need to access Discord content while using their headset and prefer not to take off the device to do so.
Solution 5: Connecting via Facebook Account
Introduction
For Oculus Quest 2 users who wish to communicate with friends or join communities similarly to how one would on Discord, but without access to a PC, connecting via your Facebook Account can be an alternative. Since Oculus is a part of Facebook (now Meta), the social features of Facebook are integrated into the Oculus platform. By making good use of this integration, you can communicate with other users in VR, though it’s worth noting that this method doesn’t access the Discord platform directly but rather uses Facebook’s social tools to emulate some of the community interactions found on Discord.
Steps
- Turn on Your Oculus Quest 2 and Wear the Headset: Press and hold the power button on the right side of your headset to turn it on, then put on the headset properly.
- Navigate to the Settings Menu: On your Oculus Quest 2 home screen, look for the gear icon which represents the “Settings” menu. Select this icon using your Oculus controllers.
- Locate and Select the Accounts Section: In the Settings menu, find and choose the “Accounts” option. This section allows you to manage your account settings and social connections.
- Link Your Facebook Account: If you have not already linked your Facebook account to your Oculus account, you should see an option to “Link Account.” Select this and follow the prompts to sign in to your Facebook account.
- Manage Privacy Settings: Once your account is linked, adjust your privacy settings to your comfort. You can choose who can see your activity and interactions in VR.
- Access Social Features: After linking your accounts, you can access Facebook’s social features through the “Social” tab in your Oculus home menu. Here you can find friends, join parties, and participate in communities.
- Communicate with Friends: Use your Oculus controllers to navigate to friends’ profiles or communities you’re interested in. You can then send messages, join voice calls, or initiate parties.
- Explore Virtual Spaces Together: With parties, you and your friends can join the same game or explore virtual spaces together as long as the environment supports multiplayer interactions.
Summary
The benefits of connecting your Oculus Quest 2 to your Facebook account include being able to utilize a range of integrated social features without needing a PC or the Discord app directly. You can connect with friends, join calls, and participate in virtual spaces in ways that are similar to Discord’s social aspects. However, the potential downsides include a dependency on Facebook’s services and privacy considerations, as well as possibly not having access to all the features specific to Discord, such as servers or specialized Discord bots. This method works best for Oculus users who already have a Facebook account and are looking for a simple solution to social interaction in VR without the need for additional software. Always be sure to understand the terms of service and privacy policy when linking accounts and sharing personal information.
Solution 6: Voice Chat Options in Oculus
Introduction
If you’re interested in communicating with your friends while using Oculus Quest 2 but can’t install Discord directly on your device, don’t worry—there are other options available. Oculus provides its own native solutions for voice chatting and hanging out with friends in VR. These features offer a simplified but effective method to stay connected while you play games or explore virtual spaces. Even though these in-built methods may not have all the advanced functionalities of Discord, they can be quite sufficient for basic communication needs.
Steps
- Understanding Oculus Social Features
Start by familiarizing yourself with Oculus Quest 2’s social features: Oculus Party, and Oculus Rooms. Oculus Party allows you to join voice calls with friends, while Oculus Rooms lets you create a private space for you and your friends to hang out virtually. - Setting Up Oculus Party
- Turn on your Oculus Quest 2 and put on the headset.
- Press the Oculus button on your right controller to bring up the universal menu.
- Select the ‘Social’ tab to see your friend list.
- To start a voice chat, select the ‘Create Party’ button. You’ll be prompted to invite friends.
- Go through your friend list, select the friends you want to invite, and then choose ‘Invite to Party.”
- Creating An Oculus Room
- While you’re in the universal menu, look for ‘Rooms”or a similar feature for social engagement.
- Select ‘Create Room”and customize it according to your preference. You might be able to choose different themes and activities depending on the latest updates.
- Invite your friends to join your room, just like how you invited them to the party.
- Joining A Friend’s Party or Room
- You can also join an existing party or room. If you receive an invitation, a notification will appear in your universal menu.
- Simply select the notification and choose ‘Join’ to enter your friend’s Party or Room.
- Controlling the Experience
- Once you’re in a Party or a Room, you can use your headset to talk with your friends. Ensure your built-in microphone is enabled in the settings.
- The volume can be adjusted using the volume buttons on your headset.
- You can leave the party or room at any time by opening the universal menu and selecting the “Leave Party” or “Leave Room” option.
Summary
Using Oculus Voice Chat options such as Oculus Party or Rooms is a simple and efficient way to connect with friends in VR. It doesn’t require additional downloads or complex setup, which is great for users who aren’t tech-savvy. These methods offer seamless integration into your virtual experience, allowing for an immersive and social experience within the Oculus ecosystem.
However, the potential downside is that these features may not have all the functionalities found in Discord, such as text messaging, custom servers, and a broad spectrum of community engagement tools. Additionally, communication is limited to your Oculus friends, which might be a smaller circle compared to your Discord network. Despite these limitations, for many users, the ease of use and integration into their VR experience might outweigh the lack of advanced features.
Solution 7: Third-Party Social Apps on Oculus Store
Introduction
Many tech enthusiasts love to stay connected with their online friends and communities, especially while immersed in the virtual reality (VR) worlds accessible through devices like the Oculus Quest 2. Discord is a popular platform for such interactions, but direct access to Discord may not always be straightforward on VR devices. Fortunately, there’s a workaround that leverages the versatility of third-party applications available on the Oculus Store that offer integration with Discord or provide similar services. Using these applications, you can engage with your communities and have a social presence inside your VR experience. I’ll walk you through how to explore and download such apps without the need for a computer.
Steps
- Power on Your Oculus Quest 2: Press and hold the power button on your headset to turn it on. Put on your headset and ensure that it’s properly adjusted for your comfort.
- Access the Oculus Home Menu: Look for the universal menu symbol on your right-hand controller, which looks like three horizontal lines or a grid icon, and press it to bring up the menu.
- Open the Oculus Store: Use your controller to point and click on the “Store” button, which might appear as a shopping bag icon within the Oculus Home Menu.
- Browse or Search for Social Apps: In the store, you may browse different categories or use the search function to look for specific social applications. Search terms like “social,” “community,” “chat,” or “messaging” might yield useful results.
- Review and Compare Apps: As you come across potential apps, open their store pages to learn more. Look for features that provide integration with Discord or those that have similar community-focused features. Reviews and ratings from other users can be very helpful in assessing the app’s quality and functionality.
- Select and Download an App: Once you’ve chosen an app that meets your needs, select it, and click on the “Free” or “Download” button if it’s a paid application. This will initiate the download and installation process on your Oculus Quest 2.
- Open and Set Up the App: After the app has been installed, open it from your library of applications. You may need to go through an initial setup process, create an account, or link existing accounts. Follow the in-app instructions carefully to complete these steps.
- Check for Discord Integration: If the app offers Discord integration, find the settings or account-linking section to connect your Discord account. This may allow you to access some Discord functionalities within the app. Be aware that not all Discord features might be available.
- Explore the Community Features: Familiarize yourself with the app’s user interface and features. Dive into the community aspects of the apps, such as joining VR chat rooms, communities, or even participating in communal VR experiences.
Summary
With third-party social apps on the Oculus Store, you can simulate the experience of using Discord or similar platforms directly within your Oculus Quest 2. This solution opens the door to an array of social interactions in VR without needing a PC. The benefits include a tailored VR social experience, potentially innovative forms of interaction, and a convenient way to stay connected while in the VR realm. However, potential downsides might include a limited set of features compared to the full Discord platform, reliance on third-party app developers’ continued support, and any privacy or security concerns that come with using third-party software. As always, your discretion and adherence to Oculus Quest’s terms of service are paramount when exploring these options.
Solution 8: Virtual Desktop or Similar App
Introduction
In a world that is increasingly embracing virtual reality (VR), the need to integrate our everyday applications into this new digital space has become apparent. For Oculus Quest 2 users, finding a way to use Discord, a popular communication platform especially amongst gamers and communities, is a common challenge, particularly when without the aid of a PC. The solution? The incorporation of a Virtual Desktop application. This nifty workaround involves using software that allows you to access and interact with your computer’s desktop environment from within the VR headset. By creating a mirror of your PC screen where Discord is open, you can simulate the Discord experience inside your VR world, enjoying chat and community engagement as if you were using Discord on your desktop.
Steps
- Preparing Your Equipment: Ensure your Oculus Quest 2 headset is fully charged and turned on. Also, make sure you have a stable Wi-Fi connection in your home, as streaming your desktop will require a significant amount of bandwidth for a smooth experience.
- Installing Virtual Desktop: Purchase and install the Virtual Desktop application from the Oculus Store. Follow the on-screen instructions to complete the installation process on your Oculus Quest 2.
- Setting Up Virtual Desktop Streamer: Go to the official Virtual Desktop website on your PC and download the Virtual Desktop Streamer application. Install it by following the provided instructions. Open the application and take note of your Oculus username as you will need it to connect your headset to your PC.
- Connecting to Your PC: Put on your Oculus Quest 2 headset, open the Virtual Desktop application, and input your Oculus username when prompted. This should connect your headset to the Virtual Desktop streamer running on your PC.
- Accessing Discord: On your PC, ensure that Discord is open and you are logged in to your account. Once connected to Virtual Desktop in your headset, you should see your PC desktop environment. Navigate to the open Discord window using the Oculus Quest 2 controllers as your mouse and keyboard.
- Navigating Discord: Interact with Discord as you would on your PC. You can join servers, participate in text chat, and use voice communication features. All of it will now appear as if you are interacting with Discord within your VR environment.
Summary
Using a Virtual Desktop transforms your Oculus Quest 2 experience, enabling you to incorporate PC activities into your VR realm. It’s beneficial as it grants you access to not only Discord but also other desktop apps without leaving VR. The potential downsides include the need for a VR-ready PC to stream from, the requirement of purchasing the Virtual Desktop app, and the possibility of encountering latency issues depending on your Wi-Fi strength and PC performance. Nonetheless, for those who wish to stay connected with their Discord communities while immersed in VR, this solution bridges the gap beautifully, merging the best of both worlds.
Solution Name
Direct Web Link Access
Introduction
Accessing Discord directly through a web link on Oculus Quest 2 is a hassle-free method to bypass the complexities of installing traditional software. This solution takes advantage of Discord’s web-based client, a version of the service optimized for browsers, allowing users to engage with their Discord communities without the need for a separate application. Such accessibility is particularly beneficial for platforms like the Oculus Quest 2, which do not have a native Discord application. By crafting a straightforward direct access web link, users can dive into their Discord chats and channels without stepping out of their virtual reality environment or reaching for a PC.
Steps
To use Discord on your Oculus Quest 2 through direct web link access, follow these steps:
- Power on Your Oculus Quest 2: Put on your headset and make sure it’s charged and turned on.
- Navigate to the Oculus Home Screen: Press the Oculus button on your right-hand controller to access the universal menu, and then select “Home”.
- Open the Oculus Browser: Look for the “Browser” icon among your installed applications or in the apps menu to open the Oculus web browser.
- Type Discord URL: Using the virtual keyboard in the browser, enter the direct URL for Discord’s web client:
https://discord.com/app - Log Into Your Discord Account: Once the Discord web client loads, enter your Discord credentials to log in. You might have to verify the login attempt depending on your security settings.
- Access Discord Features: Navigate through your servers, channels, and conversations as you would on a traditional computer browser.
- Bookmark the Discord Web Client: For easier access in future sessions, bookmark the Discord web client within the Oculus browser. To do so, look for the bookmark or the star icon (often located near the URL bar) while on the Discord page, and confirm the bookmark.
- Exit the Web Client: When you are finished with Discord, simply close the browser tab or press the Oculus button to return to the Oculus Home screen.
- Exiting and Returning to Oculus Home: Whenever you want to return to browsing or gaming, simply exit the browser or take off your headset.
Summary
The Direct Web Link Access approach provides a straightforward pathway to using Discord on the Oculus Quest 2 without the need for a PC. This method is beneficial for users looking for quick and easy access to their Discord communities while immersed in VR. However, as a web-based solution, it may lack some of the more advanced features and integration that you would typically find in a dedicated Discord application. Furthermore, navigating web pages within the VR interface can be slightly cumbersome for those unused to typing or interacting via a virtual keyboard.
One major advantage is the absence of a requirement for sideloading or any complex setup that could potentially violate the Oculus Terms of Service or require additional technical know-how. On the downside, since the experience is through the browser, it might not be as smooth or intuitive as a dedicated app, and notifications from Discord won’t appear while you’re engaged in other VR experience. Despite these potential drawbacks, this solution is ideal for users who prioritize convenience and ease of access over complete feature sets and deep platform integration.
Solution 10: Mobile App Casting
Introduction:
Mobile App Casting is a technique wherein you can project the screen of your mobile device onto another display—in this case, your Oculus Quest 2 headset. While this method does not allow you to install Discord directly onto your Oculus Quest 2, it gives you the ability to view and interact with the Discord app from your mobile device within your VR environment. This workaround is particularly useful because it allows you to stay connected on Discord with your gaming community or friends while you’re immersed in VR.
Steps:
Here is how you can cast the Discord mobile app to your Oculus Quest 2:
- Prepare Your Devices:
- Ensure that both your Oculus Quest 2 headset and mobile device are fully charged or connected to a power source to prevent interruptions.
- Connect both devices to the same Wi-Fi network for seamless casting.
- Enable Casting on Oculus Quest 2:
- Put on your Oculus Quest 2 headset.
- Select the ‘Sharing’ tab from the universal menu.
- Choose ‘Cast’, and your headset will start searching for available devices on the same network.
- Set Up Casting on Your Mobile Device:
- Open the Oculus app on your mobile device.
- Tap on the ‘Cast’ icon, which usually looks like a headset with Wi-Fi waves or a broadcast symbol, located at the top right corner of the screen.
- Select your Oculus Quest 2 from the list of available devices.
- Confirm that you want to cast your mobile device’s screen.
- Access Discord on Your Mobile Device:
- Open the Discord app on your mobile device or download it from the App Store (iOS) or Google Play Store (Android) if you haven’t already.
- Log in to your Discord account or sign up if you’re a new user.
- Start the Cast:
- Once the Discord app is open on your mobile device and your Oculus Quest 2 indicates that it is ready to cast, begin the stream.
- You should now see your mobile device’s screen within your Oculus Quest 2 headset.
- Navigate Discord in VR:
- Use your VR controllers to interact with the interface as you would touch your smartphone’s screen.
- Join voice channels, read messages, or participate in text chats as you normally would on your mobile device.
- Ending the Cast:
- When finished using Discord, you can end the cast by selecting the ‘Cast’ option in the Sharing menu of your Oculus Quest 2 and choosing to stop casting.
- Alternatively, you can stop casting from the Oculus app on your mobile device.
Summary:
Casting the Discord mobile app to your Oculus Quest 2 offers the convenience of keeping up with your social groups while in VR. This solution allows for multitasking without the need for additional hardware like a PC. However, since this is a screen mirroring method, the experience may not be as seamless as using Discord natively on a device. There may be slight lag or quality degradation depending on the strength and stability of your Wi-Fi connection. Always make sure you’re comfortable with the VR headset on for extended periods and take breaks if needed. While this method has its limitations, it remains a useful alternative to access Discord on your Oculus Quest 2 without a PC.
Conclusion
In conclusion, downloading Discord on your Oculus Quest 2 without a PC is a straightforward process once you understand the steps. With the power of SideQuest and a mobile device, you can enjoy Discord’s communication features directly from your headset. As we’ve seen, by enabling Developer Mode, installing the SideQuest app on your phone, and sideloading the Discord APK, you’ll be all set to chat with your friends while in VR. Remember to always download apps from reputable sources and enjoy your integrated virtual reality experience responsibly!
FAQs
Q: Can I use Discord on Oculus Quest 2 without sideloading?
A: Currently, there is no official Discord app available on the Oculus Store, so sideloading remains the only way to get Discord on your Oculus Quest 2.
Q: Do I need to have a developer account to sideload Discord onto my Oculus Quest 2?
A: Yes, you need to enable Developer Mode, which requires you to create a developer account on the Oculus website. However, it’s a simple and free process.
Q: Will sideloading Discord void my Oculus Quest 2 warranty?
A: Sideloading apps onto your Oculus Quest 2 does not void the warranty as long as the apps do not violate Oculus’ terms of service. Discord is a widely-used app and should not cause any warranty issues.


