Welcome to your ultimate guide on how to effortlessly download music using Musi, the popular music streaming app. Whether you’re a workout enthusiast needing tunes to keep your energy high, a commuter looking for the perfect soundtrack to your journey, or simply a music lover wanting your favorite tracks at your fingertips, this step-by-step guide is designed for you. We’ll walk you through the process in a simple, user-friendly manner, ensuring you can enjoy your music offline, anytime, anywhere. Get ready to fill your playlist with ease!
Solution 1: Utilize In-App Features
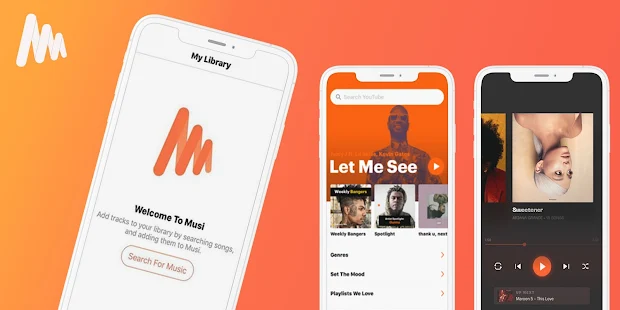
Introduction
Musi is a popular streaming app that allows users to listen to music from various sources. In some instances, music streaming apps provide legal ways to download songs directly within the app, ensuring that users can listen to their favorite tracks even when they’re offline. Such in-app features are designed to be user-friendly and fully integrated with the app’s interface, offering a seamless and legal method for downloading music. However, it’s important to note that the availability of downloading options may depend on the rights owned by the platform and individual licensing agreements with artists or record labels.
Steps
Here is a step-by-step guide to check if Musi offers an in-app download feature and how to use it if available:
- Open the Musi App: Start by launching Musi on your device. Make sure that you’re logged into your account if the app requires one.
- Explore the Interface: Familiarize yourself with the app’s layout. Look for icons and options; the download feature is usually indicated by a downward arrow icon or the word ‘Download’.
- Find a Song or Playlist: Navigate through the app to find the song or playlist that you wish to download. You can use the search function to find a specific track.
- Select the Track: Once you’ve found a song, select it to go to its detailed view, where you should see more options related to the track.
- Check for a Download Button: Look around the play controls or track options for a download button. It could be an icon of a downward arrow or may explicitly say ‘Download”
- Download the Music: If a download option is present, tap on the download button. The song will begin to download to your device. A progress icon or status bar may appear to show the download process.
- Access Your Downloads: After the download is complete, go to the designated downloads section within the app (this might be called ‘My Music’, ‘Library’, ‘Downloads’, or something similar).
- Listen Offline: Once in your downloads library, you should be able to play your downloaded music without being connected to the internet.
- Manage Your Downloads: If you need to remove downloads to save space, there’s typically an option to delete or remove them from your downloaded songs within the app.
Summary
The benefit of using in-app features to download music on Musi is the assurance of both legality and simplicity. You’re within the rights granted by the app’s terms of service, and the process is designed to be straightforward and integrated seamlessly into your user experience. There’s no need for additional tools or software. However, one potential downside could be limitations on the availability of songs for download due to licensing restrictions. Additionally, downloaded music will typically only be playable within Musi’s app environment and can’t be transferred elsewhere. This method prioritizes ease of use and supports the artists and creators by respecting copyright and licensing agreements. It also eliminates the risks and complications that can come from seeking alternative download methods.
Solution Name
Use a Music Downloader Website
Introduction
For those looking to download music to listen to offline, using an online music downloader website can be a convenient option. These websites are designed to extract audio from music streaming links and provide you with a downloadable file. This process might seem technical, but it’s quite simple and can be done without the need for additional software or advanced tech knowledge. The following information will guide you through the process of using a music downloader website to download your favorite tunes from Musi.
Steps
- Find Your Music: Begin by opening the Musi app on your device and selecting the song you wish to download. You will need the direct link to the song, so look for a way to share the song and copy the link to your clipboard.
- Choose a Music Downloader Website: Do an internet search for reputable music downloader websites that support music downloads from Musi. Be cautious and look for sites with positive user feedback to avoid malicious websites.
- Navigate to the Website: Open your web browser and type in the URL of the music downloader website you chose, or click on the link from the search results and wait for the website to load.
- Paste the Music Link: Once you’re on the music downloader website, you’ll typically find a text box where you can paste the URL of the song you want to download. Right-click and paste the previously copied link into this box or use the paste option on your mobile device.
- Initiate the Download Process: After pasting the link, look for a button on the site that might say “Download,” “Convert,” or something similar. Click this button to start the process of extracting the audio from the provided link.
- Choose File Format (if applicable): Some websites may offer you a choice in the file format for the downloaded music, such as MP3 or WAV. Select the format that suits your needs; MP3 is usually a good balance between quality and file size.
- Download the Music: The website will take a moment to process the link and extract the audio. Once this process is complete, you should see an option to download the file. Click this button, and the music file should begin downloading to your device.
- Access Your Downloaded Music: After the download is complete, navigate to the “Downloads” folder on your device or any other location where your browser is set to save downloads. You should find the music file there, ready to be played even without internet access.
Summary
Using a music downloader website can be an easy and straightforward way to obtain music for offline listening. It has the benefits of not requiring any installation of software or technical skills. It can be done from any device that has internet access and a web browser.
However, potential downsides include the legality and ethical considerations of downloading music this way. It might not be legal to download copyrighted music without appropriate permission, and such actions can impact the artists and music industry. Additionally, the quality of downloads might vary, and there is also a risk of encountering dangerous websites that might harbor malware. Always ensure the website you are using is reputable and consider the copyright laws applicable to your region before proceeding.
Solution 3: Third-Party App Integration
Introduction
In a world where music streaming has become ubiquitous, there are occasions when you may want to download your favorite tunes for offline listening. While the Musi app is a popular choice for streaming music, it may not directly support downloading songs. This is where third-party app integration becomes a practical solution. These specialized apps are capable of interfacing with streaming services like Musi to facilitate the downloading of songs onto your device. This option is often sought after by those who wish to keep a local copy of their music for instances where internet connectivity is limited or unavailable.
However, it’s important to navigate this territory with caution, as not all third-party apps operate within the confines of copyright laws or the terms of service of the Musi app. The solution detailed here assumes that the third-party app used is legitimate and respects the intellectual property rights of artists and content creators.
Steps
- Research Legitimate Third-Party Apps: Begin by researching and identifying a reputable third-party app that is known for its compatibility with music streaming services. Ensure the app you choose respects copyright law and has positive user reviews.
- Download the Third-Party App: Once you’ve selected a suitable app, go to your device’s app store, search for the app by name, and proceed to download and install it on your device.
- Grant Necessary Permissions: Upon installation, the app may request permissions to access certain features on your device. Read these permissions carefully and grant them only if they seem reasonable for the app’s functionality.
- Configure the App Settings: Open the third-party app and explore its settings. Some apps may require you to sign in with your Musi account details or configure certain download preferences before you proceed.
- Navigate to Musi Through the Third-Party App: Some apps will have an in-built or integrated browser to navigate directly to Musi. If this is the case, use this feature to go to Musi within the app.
- Locate the Music: Once you are on Musi via the third-party app, search and locate the music you wish to download.
- Download the Song: There should be an option (a button or a link) provided by the third-party app to download the song you’re currently playing or viewing. Tap on the download option.
- Check Your Downloads: After the download is complete, check the app’s specified downloads folder or section to confirm the song is there. Some apps may also allow you to directly save the music to a preferred location on your device.
- Play Your Downloaded Music: You can now play the downloaded music anytime through the third-party app or any other media player that recognizes the file format.
Summary
Utilizing third-party app integration to download music from Musi can be quite beneficial, especially for music enthusiasts looking to enjoy their favorite tunes without the need for an internet connection. This solution provides an added layer of convenience and extends the usage of your Musi app beyond streaming.
The benefits of this approach include enhanced access to music and the potential for better playback quality since local files may not be subject to streaming limitations or buffering issues.
On the flip side, the major downsides include the potential risk of violating copyright laws or terms of service, the quality and availability of support from third-party apps, and the inherent risks associated with granting permissions to unofficial software. It’s always recommended to proceed with caution, ensure that you’re respecting the creators’ rights, and only use apps that operate legitimately. Furthermore, some third-party apps may require a separate subscription or purchase, adding an additional cost to your music listening experience.
Solution 4: Recording Tools
Introduction
Recording Tools are applications designed to capture audio output from your device. When you play music on Musi, these tools can record the song in real-time and save it as an audio file on your device. This method can serve as an alternative when direct downloading options are not available or are limited.
One of the primary benefits of using audio recording tools is that they can bypass the common restrictions found in music streaming apps. For users who want to listen to music offline or keep a copy of a song that is no longer available online, recording can be a practical solution.
However, it’s important to note that capturing audio streams and keeping the recordings can raise legal and ethical considerations. Always ensure that you’re aware of your rights and follow the terms of service of both the Musi app and the recording tool you choose to use.
Steps
Here’s how to use an audio recording tool to record music from the Musi app:
- Select a Recording Tool: Choose a reliable audio recording app suitable for your device, whether it’s iOS, Android, or a computer. Some popular ones are Audacity for computers, or the native voice memo apps found on most smartphones.
- Install the Tool: Once you’ve selected a recording tool, download it from the appropriate app store or website and follow the on-screen instructions to install it on your device.
- Prepare the Recording: Open the recording tool/app. Familiarize yourself with the controls, such as Play, Pause, Stop, and Save. Look for settings that allow you to choose the audio quality and format of the recording.
- Open Musi App: Launch the Musi app and navigate to the song you want to record.
- Start Recording: Go back to the recording tool. Make sure it’s ready to capture sound, then press the recording button.
- Play the Music: Quickly switch to the Musi app and start playing the song you wish to download. Make sure the volume is set to a level that will ensure clear recording without distortion.
- End Recording: After the song has finished playing, switch back to the recording tool and press the stop button to end the capture.
- Save the Recording: Save the recorded audio file to your device. You might be prompted to choose a file name, format (like MP3 or WAV), and select a save location.
- Review the Recording: Play back the recording to make sure the quality is satisfactory and the entire song has been captured.
- Edit if Necessary: If the recording tool provides editing options, you might want to trim any silence from the beginning or end of the track, or adjust the volume.
Summary
Recording Tools offer a hands-on approach to save music from Musi for offline listening. It’s a process that can be beneficial for those who need a permanent copy of a song or piece for personal use. The benefits include the ability to capture any audio stream playing on your device and having control over the audio file format and quality.
However, potential downsides include the possible degradation of audio quality due to the recording environment, and the time-consuming nature of the process, as you must play the entire song to capture it. Also, the legal and ethical aspects cannot be ignored—make sure to respect copyright laws and only use recordings for personal, non-distributive purposes.
Remember to check the Musi app’s terms of service as well as the copyright laws relevant to your country before proceeding to record music from the app. The goal of using recording tools should be to enjoy music while respecting artists”and creators”rights.
Solution 5: Desktop Software
Introduction
In today’s technologically driven world, enjoying music often means streaming it online through services like Musi. However, there may be times when you wish to have your favorite songs available offline—for instance, when you’re traveling or in areas with poor internet connectivity. This is where desktop software comes in handy. Desktop programs can provide a bridge between streaming music and your personal music library, allowing you to download songs for offline playback. Now, let’s walk through the simple steps of using such software to download music from streaming services like Musi.
Steps
- Research and Select Software:
Begin by researching desktop software that is capable of downloading music from streaming services. Look for reputable programs that are compatible with your computer’s operating system (Windows or macOS). - Download and Install the Software:
Once you’ve selected a suitable software, visit the official website of the program and download the installation file. Double-click on the downloaded file and follow the on-screen instructions to install the software on your computer. - Familiarize Yourself with the Software:
After installation, open the program and take some time to explore its interface and settings. Each software may vary, so it’s essential to understand how it works before proceeding. - Configure Audio Settings if Necessary:
Some software may require you to adjust audio settings for optimal recording quality. Ensure that you have selected the correct audio source (if applicable) and set the desired audio quality. - Open Musi or Play the Song:
If the software works by capturing audio from your browser, open the Musi service in your web browser and navigate to the song you wish to download. If the program requires a direct connection to your device, ensure that your device is connected to the computer via USB and that Musi is open and playing the song. - Start the Download/Recording Process:
With the song playing on Musi, go back to the desktop software and press the appropriate button to begin the download or recording process. Some software may automatically detect the song and start downloading, while others may require you to manually hit ‘Record’ or ‘Download’. - Finish and Save the Song:
Once the song is fully played and the software has captured the audio, stop the recording if necessary and save the file to your computer. Name the file appropriately and choose a convenient location on your computer for easy access. - Transfer the Music to Your Desired Device (Optional):
If you want to listen to the downloaded music on a different device, such as your smartphone or tablet, connect that device to your computer and transfer the files as you would any other music file.
Summary
Utilizing desktop software to download music from Musi presents a straightforward solution for listening to your favorite tunes offline. The benefits include having personal copies of songs for on-the-go enjoyment without the need for an internet connection. Furthermore, this method can be a lifesaver during travel and in areas with unreliable internet access.
However, it’s worth noting the potential downsides. This process may be perceived as daunting for non-technical individuals, and the legality of downloading music without appropriate permission is questionable and may infringe copyright laws. Always be sure to respect copyright and use such software ethically, understanding the provider’s terms of service and laws pertaining to copyright and music downloading. Additionally, not all software is created equal, so users must select a trusted and virus-free program to avoid harming their computers. By following these steps, music enthusiasts can enjoy their streaming favorites anytime, anywhere, with just a bit of preparation.
Solution 6: Browser Extensions
Introduction
The convenience of web browsing extends beyond surfing web pages and includes various functionalities that can be integrated into your browser; one such functionality is through browser extensions. Previously reserved for tech-savvy individuals, browser extensions have become mainstream, allowing users to tailor their internet experience to their specific needs. For music enthusiasts, certain browser extensions come as a boon ”they can capture and download streaming audio, such as music tracks played on Musi, right from your web browser.
This solution is particularly useful for users who prefer using their computers to enjoy music and would like to have their favorite songs from Musi accessible offline. Browser extensions work by monitoring the data your browser is processing and then providing the option to extract and download this data ”in this case, music tracks.
Steps
- Choosing the Right Browser: Ensure you are using a web browser that supports extensions, such as Google Chrome, Firefox, or Edge.
- Finding a Suitable Extension: Look for browser extensions designed to download streaming music or media. This can usually be done by visiting the official web store for your browser and searching for “music downloader,” “streaming audio downloader,” or “media capture” extensions.
- Installing the Extension: Once you’ve decided on an extension, click the ‘Add to browser’ or ‘Install’ button from the web store page. Follow any prompts to confirm the installation.
- Navigating to Musi: Access Musi through your web browser. If you haven’t used it on the browser before, you might need to log in to your account.
- Playing the Desired Track: Start playing the track you wish to download. Ensure it’s the only audio playing to prevent downloading of other unwanted sounds.
- Using the Browser Extension: Click on the browser extension’s icon, usually located at the top-right corner of your browser. Look for an option to capture or download the playing music. Some extensions will show a list of all the media being loaded on the current page—select the correct file which is your music track.
- Downloading the Music: After selecting the appropriate option from the extension’s dropdown menu or interface, follow any prompts to download the music to your local storage.
- Saving the File: Choose a destination on your computer to save the downloaded track. It’s usually best to place it in a folder designated for music, to stay organized.
- Managing Your Downloads: Ensure your music files are named correctly and have all the necessary metadata such as artist, album, and title if not automatically populated.
Summary
Using browser extensions to download music from Musi provides a straightforward way to save your favorite tracks for offline listening. This method is typically user-friendly and doesn’t require advanced technical knowledge.
Benefits include the convenience of capturing audio directly through your browser without needing additional software, as well as generally being a free method.
However, there are potential downsides. First, the legality and ethical considerations; using such browser extensions might go against Musi’s terms of service and can infringe on copyright laws. Always make sure you are downloading music legally. Another downside could be the quality of the audio, which might not match the sound quality of a direct download or a recording made from a higher-end tool. Lastly, some extensions could potentially be malicious or compromise your privacy, so always use extensions from reputable sources and read reviews before installing.
Remember, supporting your favorite artists and the music industry is very important, so whenever possible, opt for methods that compensate creators for their work.
Solution 7: Screen Recording
Introduction
Screen recording is a digital tool available on most modern smartphones that allows you to capture whatever is happening on your screen, including both the visuals and the audio. This feature can be particularly useful for saving content that cannot be downloaded through conventional means, such as certain songs on Musi. While screen recording is not a direct means to download music, it can serve as an alternative way to save a copy of the song for personal offline use.
This method rests on the premise that you can play the song within the Musi app and simultaneously record your phone’s screen to capture the audio. It’s important to note that while screen recording can be a way to keep music for offline listening, it is essential to respect copyright laws and use recorded content appropriately, ensuring it is for personal use and not distributed or shared.
Steps
To download music on Musi using screen recording, follow these steps:
- Access the Screen Recording function on your smartphone:
- For iOS devices, navigate to ‘Settings’ > ‘Control Center’ > ‘Customize Controls’, then tap the ‘+’ next to ‘Screen Recording’.
- For Android devices, the screen recording feature may be found as a quick setting in the notification panel. If it’s not there, you may need to add it or download a third-party app if your device does not support this feature natively.
- Set up Screen Recording with Audio:
- On iOS: Swipe into the Control Center and long-press the screen recording icon to ensure ‘Microphone Audio’ is turned on.
- On Android: Swipe down twice from the top of the screen and tap ‘Screen Record’. You might need to select ‘Record audio’ from the options presented to you.
- Begin Screen Recording:
- On iOS: Open Control Center and tap the screen recording button. A countdown will begin, and then your screen (along with audio) will begin recording.
- On Android: After tapping the ‘Screen Recorder’ function, wait for the countdown, if there is one, and then start playing your music on Musi.
- Open Musi and Play the Song you want to save:
Navigate to the song you wish to download within the Musi app, and then play it. Make sure that the song plays through completely to capture the entire track. - Stop the Recording:
- On iOS: Swipe into the Control Center and tap the red status bar at the top of your screen, then tap ‘Stop’.
- On Android: Pull down the notification panel and tap the ‘stop’ button on the screen recording notification.
- Find and Edit the Recording:
The video you recorded will be saved in your ‘Photos’ (iOS) or ‘Gallery’ app (Android). You may edit the recording to trim any parts that do not contain the music, such as the screen taps at the start and end of the recording. - Convert the Video to an Audio File (Optional):
If you prefer to have just the audio, you can use various apps or online services to extract audio from the video file, resulting in an MP3 or similar audio format.
Remember to only use the screen recording for personal use, and understand that the quality of the recorded audio may not be on par with a direct download or streaming.
Summary
The benefits of using the screen recording method are that it’s generally simple to use, it’s built into most smartphones, and it doesn’t require any additional costs or equipment. It can be a convenient workaround when other download options are not available. However, there are downsides to this approach. The audio quality captured via screen recording may not be as high as a direct download or stream since it can pick up any ambient noise or notifications sounds. Additionally, this method is more time-consuming and requires manual editing to isolate the song audio from the screen recording. Always ensure you are abiding by the relevant copyright laws and terms of service when using screen recording as a means to save music from Musi.
Introduction
Using shared playlists on Musi can be an exciting way to discover new music and, in certain cases, to obtain music tracks that other users have made available for download. This method leverages the community aspect of Musi, where users can create playlists and, depending on the service’s features, enable the download of some tracks. Keep in mind that the availability of downloadable content is subject to the sharing user’s preferences and the Musi app’s functionality at the time. This method is perfectly suitable for non-technical users, as it’s just a matter of navigating within the app itself.
Steps
- Open the Musi App: Launch the Musi app on your device. Make sure you’re logged in to your account if required.
- Explore Shared Playlists: Look for a feature within the app that allows you to browse playlists created by other users. This could be a ‘Community” ‘Shared” or ‘Public Playlists”section.
- Find Downloadable Content: While exploring, try to identify playlists that indicate tracks are available for download. This could be denoted by a download icon or mentioned in the playlist description.
- Listen to the Playlist: Once you have found a playlist with downloadable music, play it to ensure that it includes the tracks you would like to download.
- Download the Tracks: If the playlist has tracks available for download, there should be an option or a button next to the song(s) allowing you to download them directly. Tap on the download icon or link provided.
- Confirm the Download: The app may ask for confirmation or show a prompt to initiate the download process. Confirm if required.
- Access Downloaded Music: After the download is complete, go to the section of the app where your downloaded music is stored. This is commonly found in a ‘Downloads”or ‘Library”tab.
- Playback Offline: Now you can play the downloaded tracks even when offline. Navigate to your downloaded music section, select a track, and press play.
Summary
Benefit-wise, this solution is user-friendly and does not require any additional tools or software. It allows for the discovery of new music through community interaction and the ease of having your favorite tracks available offline. On the downside, the range of downloadable music might be limited due to individual user sharing preferences and copyright constraints, and not all tracks in shared playlists may be available for download. It’s important to respect copyright and adhere to the app’s guidelines to ensure that your music enjoyment remains within legal boundaries.
Solution 9: Music Conversion Services
Introduction:
Often, music enthusiasts come across a song or playlist on the Musi app that they’d love to have on their devices to listen offline. While Musi doesn’t directly offer a download feature, music conversion services are a popular workaround. These online services specialize in converting music played on streaming platforms into downloadable files, usually in MP3 format, which is compatible with most music players. The process is relatively simple and can be performed with a few clicks. In this guide, we’ll go through how to use a music conversion service to download music from Musi.
Steps:
- Open Musi App and Locate the Song:
- Launch the Musi app on your device.
- Browse to the song or playlist that you want to download.
- Copy the Song or Playlist’s URL:
- While the song or playlist is playing, look for the ‘Share’ button (commonly symbolized by an arrow or three connected dots).
- In the sharing options, find the button to ‘Copy Link”or ‘Copy URL.”
- Choose a Music Conversion Service:
- Open your web browser on your computer or mobile device.
- Search for a reliable music conversion service by typing keywords like “music converter for Musi”or “streaming music downloader”in your search engine.
- Use the Conversion Service:
- Paste the copied URL from Musi into the conversion service’s search box.
- (Optional) Choose the desired output format if the service provides multiple options (MP3 is most common).
- Click on the ‘Convert”button to start the conversion process.
- Download Your Music:
- Wait for the conversion process to complete. It may take a few moments.
- Once done, a download link or button should appear.
- Click the ‘Download”button to save the audio file to your device.
- Locate the Downloaded Music File:
- On most devices, the downloaded file will be in the ‘Downloads”folder.
- Navigate to your device’s file manager or browse your downloads via the web browser’s download history.
- Transfer the Music to Your Preferred Music Player:
- If the music file isn’t automatically stored in your player of choice, manually move it.
- Use your device’s file manager to cut or copy the file, then paste it into the music folder or directory used by your music player.
Summary:
Music conversion services provide an accessible way to obtain music files from streaming services like Musi. It’s a convenient solution for those who want to enjoy their favorite tunes offline. Just remember to respect copyright laws and always use these services ethically.
The benefit of using music conversion services is accessibility and the ability to listen to music without an internet connection, which can be indispensable for travel or areas with limited connectivity. However, the potential downsides include variable audio quality, possible legal and ethical issues, and sometimes unintended downloads (like ads) that may accompany the music file. Always ensure you’re complying with the service’s terms of use and copyright laws to avoid infringement.
Solution Name
File Transfer From Friends
Introduction
Transferring files from friends is a method of receiving music that they have already downloaded. It’s an age-old practice updated for the digital world: just as you might have borrowed a CD or a cassette tape from a friend in the past, today, you can get digital music files directly from them. This can sometimes be a convenient and speedy way to expand your music library, especially if you’re looking to get a specific song or album that someone you know already possesses.
The idea here is relatively straightforward: if a friend has downloaded music from Musi or another source, they can share those files with you through various means. There are multiple file-sharing apps, services, and traditional methods like USB drives or email that can facilitate this transfer.
Remember, it’s important to ensure that the music being shared is not protected by copyright, or if it is, that your friend has the legal right to share it with you. Unauthorized sharing of copyrighted music can lead to infringement issues both for the sharer and the recipient.
Steps
- Verify Legalities: Confirm that the music to be shared is not copyrighted, or if it is, that your friend has permission to distribute it. This is a crucial first step for ethical and legal reasons.
- Choose a Transfer Method: Discuss and select a method of transfer with your friend. This could range from file-sharing apps (like Dropbox, WeTransfer, or Google Drive), direct device-to-device transfer (using Bluetooth or NFC), email (if the file size allows), or even using a physical USB drive. The method chosen will depend on the file sizes and the devices you both have at your disposal.
- Prepare the Music Files: Your friend should locate the music files on their device. If they are on a computer, they might be in a designated ‘Music’ folder or the download directory. If they’re on a phone, they’ll likely be in a music or multimedia folder within the device’s file manager app.
- Initiate the Transfer: Once the files are prepared and the method is selected, your friend will start the transfer. For online services, they’ll upload the files and then send you the link. For emails, they’ll attach the files and send them to you. For physical transfers, they’ll copy the files to the USB drive.
- Receive the Files: On your end, you’ll need to accept the files. For online transfers, this means clicking on the link and downloading the files to your chosen location. For email, you’ll download the attachments from the email. For physical transfers, you’ll take the USB drive and copy the files to your device.
- Organize Your Music: Once you’ve received the files, organize them on your device. You might want to create a special folder for music if you don’t already have one.
- Enjoy Your Music: Now that the transfer is complete and your music is organized, you can enjoy listening to it on your preferred music player.
Summary
The benefit of transferring music files from friends is that it can be a quick way to acquire music, especially if downloading from the original source is not an option. It can also be more data-efficient if your friend can transfer the files to you directly without using an internet connection.
However, there are downsides to this method. The quality of the music might be lower than if you downloaded it directly from a legitimate source. There’s also a risk of transferring malicious software unknowingly if the files have not been obtained from a trustworthy source or if the storage device is infected. Most importantly, sharing copyrighted music without the proper rights can be illegal.
It’s always recommended to follow best practices for digital content sharing and to ensure that you respect copyright laws to support artists and the creative industry.
In conclusion, downloading music on Musi is a straightforward process that can significantly enhance your listening experience. By familiarly navigating the app’s interface and understanding the different features it offers, you execute seamless music downloads and create personal, ever-ready playlists. Regardless of technical prowess, following the guide we provided will help you enrich your music library on Musi with ease.
FAQs:
- Is it free to download music from Musi?
- Can I download music on Musi directly to my device?
- Will the music I download from Musi be accessible offline?


