Welcome to the beginner’s guide to downloading music onto your MP3 player! In today’s digital age, enjoying your favorite tunes anywhere you go has never been easier. Whether you’re gearing up for a workout session, prepping for a journey, or just want to unwind with your top tracks, this guide will walk you through the process step by step. You don’t need to be a tech whiz to get started; our straightforward instructions are designed for those just starting out with technology. Get ready to fill your MP3 player with a world of music by following the easy steps we’ll outline for you. Let’s dive in and get your personal soundtrack ready for play!
Solution 1: Direct Download from Online Stores
Introduction:
In a world where music has become as much a part of our online lives as social media, downloading music directly from online stores is both convenient and legal. Major music retailers like Amazon Music, iTunes, and Google Play Music offer a plethora of songs and albums that you can purchase and download almost instantly. These platforms boast an easy-to-use interface that even those without technical knowledge can navigate with ease. This method of obtaining music ensures you’re respecting artists’ and producers’ copyrights while enjoying your favorite tunes on your MP3 player.
Steps:
- Choose an Online Music Store:
Decide on the online store where you want to purchase your music. Amazon Music, iTunes, and Google Play Music are popular choices. Make sure they’re compatible with your MP3 player format (most are MP3 compatible). - Create an Account:
You’ll need to set up an account if you don’t already have one. This typically involves providing some personal information, such as your name, email address, and payment details. - Browse or Search for Music:
Use the search bar to find specific songs, artists, or albums, or browse through genres, top charts, and curated playlists for inspiration. - Purchase Music:
Once you’ve found music you like, add it to your cart. Proceed to checkout when you’re ready. Review your order and complete the purchase process by making a payment with your preferred method. - Download Your Purchased Music:
After purchasing, look for the option to download the music file(s) to your computer. Typically, there will be a ‘Download’ button or a link in your account library. - Locate Your Downloaded Files:
After the download is complete, locate the music files on your computer. They’re usually found in the ‘Downloads’ folder unless you’ve specified a different location. - Connect Your MP3 Player:
Connect your MP3 player to your computer using a USB cable. Your MP3 player might display a notification that it is connected, and your computer should recognize it as an external device. - Transfer Music to Your MP3 Player:
Open the folder where your MP3 player is recognized (usually in ‘My Computer’ or ‘This PC’ on Windows, or on the desktop or Finder for Mac). Navigate to the folder on your MP3 player where music files should be saved. Then, drag the downloaded music files from your computer to your MP3 player’s music folder. - Safely Disconnect the MP3 Player:
Once the transfer is complete, safely eject your MP3 player by clicking on the ‘Eject’ icon before disconnecting the USB cable. This helps prevent data corruption. - Enjoy Your Music:
Disconnect your MP3 player after it has been safely ejected. Now, you can enjoy your newly downloaded music anytime, anywhere.
Summary:
Benefits:
- Legal and supports the artists.
- High-quality, official music tracks.
- Wide range of music available.
- Simple and beginner-friendly process.
Potential Downsides:
- Cost per song or album can add up.
- Requires a payment method.
- Not all songs might be available on every platform.
With this approach, beginners can feel confident in navigating the world of online music purchases, leading to a personal, portable library of high-quality music they can legally own. The simplicity of the process affords everyone the chance to support their favorite artists and enjoy their music conveniently on their MP3 players.
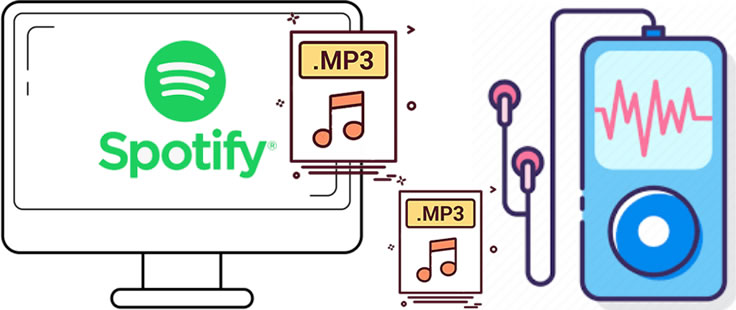
Solution 2: Using a Music Subscription Service
Introduction
In an era where streaming services dominate the music industry, subscription-based platforms like Spotify, Apple Music, and Tidal offer an all-you-can-eat buffet of tunes for a monthly fee. These services not only stream music but also allow members to download songs, albums, or playlists directly onto their devices, which can be a boon for music lovers who want to enjoy their music offline or transfer it to devices that may not support streaming apps, such as a traditional MP3 player.
Steps
- Choose a Subscription Service: Research and select a music subscription service that fits your needs. Look for factors like the size of the music library, audio quality, cost, and the presence of an offline listening option.
- Create an Account & Subscribe: Once you have chosen a service, sign up for an account. This may involve providing personal information and a payment method. Then, choose a subscription tier that includes offline listening.
- Install Music Software: Install the necessary software on your computer if the service requires it. Services like Spotify and Apple Music have desktop applications you can download to manage your music.
- Browse & Select Music: Use the service’s interface to browse and search for music you wish to download. This can be individual tracks, full albums, or curated playlists.
- Download for Offline Listening: Find the option to download music for offline listening within the service’s application. This often involves clicking a download button or toggling a switch that appears near the chosen music.
- Connect Your MP3 Player: Plug your MP3 player into your computer using a USB cable. Wait for your computer to recognize the device, which may appear as a removable disk.
- Transfer Music Files: Open the folder on your computer where the downloaded music files are stored. If the service allows direct transfer, you can simply drag and drop the music from this folder to your MP3 player’s music directory.
- Eject MP3 Player: Once the transfer is complete, safely eject your MP3 player from the computer. Ensure you follow the proper procedure to avoid data corruption.
- Enjoy Your Music: Unplug your MP3 player and put on your headphones. Navigate to the music library on your MP3 player and start listening to your downloaded music offline!
Summary
Using a subscription service for downloading music to your MP3 player can be an excellent way to access a vast library of songs with the added benefit of high-quality audio and legal assurance. One of the significant advantages is that you can keep your music organized and up-to-date with the latest releases.
However, there are potential downsides to consider. The music downloaded from these services is often encrypted with Digital Rights Management (DRM), meaning they might not be transferable directly to a non-associated MP3 player. Some services may require additional steps to remove DRM, which might not be suitable for everyone. Moreover, the subscription fee is ongoing, and access to downloaded songs may be lost if the subscription lapses. Carefully considering these factors will help ensure a positive experience with your music listening and handling.
Solution 3: Converting YouTube Videos
Introduction
YouTube is a treasure trove of music videos, live performances, and other audio content that isn’t always readily available on traditional music platforms. For music enthusiasts looking to expand their MP3 player library with these unique finds, converting YouTube videos into MP3 files can be an ideal solution. This process involves using online converter tools that extract the audio from a YouTube video and save it as an MP3 file, which can then be downloaded to your computer and transferred to your MP3 player. It’s a simple, often free method to procure music that may not be sold commercially. However, it’s important to be aware of copyright laws and to only download content that is legally permissible.
Steps:
- Find a Reputable YouTube to MP3 Converter: Search for a reliable and safe YouTube to MP3 converter online. Read reviews and ensure the website doesn’t require unnecessary personal information or downloads.
- Select the YouTube Video: Go to YouTube, find the video containing the song you wish to convert, and copy the video’s URL from the address bar.
- Paste the Video URL: Open the YouTube to MP3 converter in your web browser. There will be a field where you can paste the copied URL.
- Choose MP3 Format: Before starting the conversion, ensure that MP3 is selected as the desired output format. This is the format compatible with most MP3 players.
- Start the Conversion: Click the button to convert the video (this could be labeled as ‘Convert’, ‘Download’, ‘Start’, etc.). The converter will process the video and extract the audio, turning it into an MP3 file.
- Download the MP3 File: Once the conversion process is complete, a download link should appear. Click on this to save the MP3 file to your computer. Make note of where it is being saved, such as “Downloads” or a folder of your choice.
- Transfer to Your MP3 Player: Connect your MP3 player to your computer with a USB cable. Once your computer recognizes the device, open it like you would a folder. Then, navigate back to where your downloaded MP3 file is stored.
- Copy the File: Drag and drop the MP3 file from your computer to the MP3 player’s folder. Alternatively, right-click on the MP3 file, select ‘Copy’, then navigate to the MP3 player’s folder and select ‘Paste’.
- Eject the MP3 Player: Safely eject your MP3 player from your computer. This is important to prevent data corruption.
- Enjoy Your Music: Disconnect the MP3 player from the computer. You should now be able to find and play the converted song on your MP3 player.
Summary
The benefits of using a YouTube to MP3 converter include accessing a wide variety of content, the simplicity of the process, and often no associated costs. This can be invaluable for music that is not available for purchase or not present on streaming platforms. One of the potential downsides is that the legality of downloading content from YouTube varies and could violate copyright laws depending on the content and jurisdiction. Additionally, the audio quality of the converted MP3 files may not match that of officially released music. Always ensure you are respecting artists’ rights and copyright when using such conversion tools.
Solution 4: Ripping from CDs
Introduction
In the age of streaming and instant digital downloads, it might seem quaint to talk about CDs – those shiny, circular discs that revolutionized the music industry in the 1980s. Yet, many music lovers still have their cherished collections on this physical format. If you’re one of them, you possess a goldmine of high-quality audio that can be converted into MP3 files for use on modern devices like MP3 players. The term “ripping” refers to the process of copying audio from a CD and converting it into digital music files on your computer. It’s a legal way to digitize your personal library, provided you don’t distribute the files.
Steps
- Gather Your Materials: You’ll need a computer with a CD/DVD drive, your music CD, and media player software capable of ripping CDs, such as Windows Media Player, iTunes, or VLC.
- Install Media Player Software: If you don’t already have media player software with CD ripping capabilities installed, download and install one. Free options like VLC are available for both Mac and Windows users.
- Open Your Media Player: Insert the music CD into your computer’s CD/DVD drive and open your chosen media player software.
- Initiate Ripping Process: Locate the “Rip” or “Import” button in your media player. In Windows Media Player, this is often found in the “Rip” tab. In iTunes, go to the “File” menu and select “Import CD.”
- Choose MP3 Format: Before ripping, ensure the output format is set to MP3. You might find options to select the quality or bitrate of the MP3. Higher bitrates generally mean better quality but larger file sizes.
- Select Tracks to Rip: You might not want to rip the entire CD. If that’s the case, uncheck the tracks you don’t want to transfer. Leave checked only those you wish to convert into MP3 files.
- Start Ripping: Click the “Rip CD,” “Import CD,” or equivalent button to start the process. Your computer will read the CD and convert the tracks into MP3 files.
- Find the MP3 Files on Your Computer: Once ripping is complete, locate the MP3 files in the default music folder of your media player or in the folder you specified before ripping.
- Transfer MP3 Files to MP3 Player: Connect your MP3 player to your computer using a USB cable. Your MP3 player may appear as an external drive. Copy and paste or drag-and-drop the MP3 files from your music folder to your MP3 player’s folder.
- Eject Your CD and MP3 Player: After the transfer is complete, safely eject both your music CD and MP3 player from your computer.
- Listen and Enjoy: Safely remove your MP3 player from the USB cable, put on your headphones, and enjoy your music on the go.
Summary
Ripping CDs allows you to digitally preserve your music collection and makes it portable for modern devices. The benefits of this method include high-quality audio, the satisfaction of owning your music, and the legality of personal use conversion. The downside is the time commitment required for ripping CDs, especially if you have a large collection, and the necessity of having a functioning CD/DVD drive in a world where these drives are becoming less common on new computers. Despite these challenges, ripping CDs can be a rewarding process for music aficionados wanting to keep their collections alive in the digital era.
Peer-to-Peer File Sharing
Introduction
Peer-to-peer (P2P) file sharing is a method of downloading and distributing files over the internet by connecting directly to other users’ computers. Instead of downloading from a centralized server, you use a software program that connects to other computers running the same program and shares files among users. This technology became famous by programs like Napster, LimeWire, and BitTorrent and continues to be a way for users to share and obtain large files, including music.
However, P2P sharing comes with certain risks and caveats. While it’s a powerful way to find a vast array of music, it is essential to be conscientious of the legality of shared files and the potential to inadvertently download malicious software.
Steps
To begin downloading music using P2P file sharing safely and effectively, follow these steps:
- Choose a Reputable P2P Program:
Research and select a P2P file-sharing program that is well-reviewed and accepted for its security and legality. Examples include qBittorrent or uTorrent (for BitTorrent protocol). Be wary of lesser-known or outdated applications that may not provide adequate security. - Install P2P Software:
Once you have chosen the software, visit the official website and download the installer. Follow the on-screen instructions to install the program on your computer. - Configure Program Settings:
After installation, open the software and go through the settings. Look for options to limit the amount of bandwidth the program uses, as well as any security settings. Set up folders for your downloaded files and possibly shared files, depending on your decision to allow others to access your files. - Search for Music:
Use the search function within the P2P application to find the music you want to download. You might need to try different keywords or be specific about the artist and song title to find the right file. - Check File Validity:
Before downloading, check the file details like size and format to gauge whether it’s a legitimate music file. Be cautious of files that are too small to be songs or lack detailed descriptions. - Download the Music File:
Once you’ve found a reliable source, proceed to download the file. Monitor the download process for speed and ensure that it completes successfully. - Scan for Viruses:
Because P2P networks can sometimes harbor malicious software, use a reliable antivirus program to scan each download before opening the file. - Add Music to Your MP3 Player:
Connect your MP3 player to your computer via USB. Then, locate the downloaded music file on your computer and drag it to the MP3 player’s music folder in your file explorer or by using music management software that came with your MP3 player.
Summary
Using P2P file sharing to download music for your MP3 player can open a vast world of media but it does require caution. The benefits are that you may find rare or hard-to-locate music, and it can be cost-effective. However, the potential downsides include the risk of downloading illegal content or exposing your system to malware. Additionally, navigating P2P networks and ensuring downloads are safe and legal can be tricky for beginners. Always ensure that the music you download is not protected by copyright or shared unlawfully, as this could lead to legal consequences.
Free Music Websites
Introduction
In a digital world teeming with music, free music websites stand as a beacon for those seeking to download MP3 tracks without financial commitment. These sites often hold a treasure trove of legal music, ranging from unknown artists eager to share their work to established musicians offering a selection of their tracks for free. The key here is finding reliable and legitimate websites that provide free music downloads without violating copyright laws.
Steps
- Research for Legitimate Websites: Begin by searching online for websites that offer free music downloads. Look for reviews and recommendations to ensure their legality. Some reputable websites include Free Music Archive, Bandcamp, and Jamendo.
- Navigate the Music Library: Once you’ve found a reliable site, explore its library. These sites typically categorize music by genre, popularity, or even mood, making it easier for you to find the kind of music you enjoy.
- Listen to Tracks: Before you download, you might want to listen to the tracks to make sure they are to your liking. Many sites offer a streaming option for this purpose.
- Review Download Options: Some tracks may be directly downloadable by clicking a ‘Download’ button, while others might require you to right-click on a link and select “Save link as…” to save the file to your computer.
- Create an Account if Necessary: Some websites may require you to create a free account to download music. This can often unlock more features or provide you with download links.
- Download the Music: Once you’ve decided on a song or album, click the download option provided. Make sure you are downloading an MP3 file, as this is the format you’ll need for your MP3 player.
- Save Files Correctly: When you click to download, a window should appear asking where you would like to save the file. Choose an easy-to-remember location on your computer, like the ‘Music’ folder or a dedicated ‘Downloads’ folder.
- Check Download Progress: Keep an eye on the progress of your downloads. They should finish relatively quickly, depending on the size of the file and your internet speed.
- Transfer to MP3 Player: Connect your MP3 player to your computer with a USB cable, and open it as a folder on your computer. Then, simply drag and drop the downloaded MP3 files into the appropriate folder on your MP3 player.
- Safely Eject Your MP3 Player: Once the transfer is complete, ensure that you eject the MP3 player properly by right-clicking on its icon on your computer and selecting ‘Eject’, to prevent any potential data loss.
- Enjoy Your Music: Disconnect your MP3 player and put on your headphones. You can now enjoy your new music anywhere, anytime.
Summary
Using free music websites is a cost-effective and simple way to expand your music library. It gives you access to a variety of music from different genres and artists. This solution is particularly beneficial because it is accessible to anyone with an internet connection and does not require sophisticated technical skills.
However, the downsides may include the variability in the quality of music files and the limited availability of popular mainstream music. Also, navigating copyright restrictions is crucial to avoid legal issues. Always ensure that the website you’re using has the rights to offer the music for download. With time and a little patience, you can find and enjoy a wide array of music through these sites, filling your MP3 player with diverse sounds and rhythms without the need for an ongoing subscription or per-track fees.
Solution 7: Transferring from a Computer
Introduction
Transferring music from a computer to an MP3 player is a straightforward process that has been commonly used for decades. Most MP3 players are designed to be easily compatible with computers, allowing you to transfer your existing MP3 files directly without needing to redownload or convert them. This solution works well for those who have amassed a library of MP3 files over the years or have downloaded music to their computer from various legal sources. Not only is this method cost-effective, as it doesn’t require any additional purchases, but it is also relatively simple, even for beginners.
Steps
To transfer music from your computer to your MP3 player, follow these detailed steps:
- Locate Your Music Files on Your Computer
Begin by finding where your music files are stored on your computer. They might be in your “Music” folder, or perhaps you have organized them in a different location. Look for files typically ending with the .mp3 extension. - Connect Your MP3 Player to Your Computer
Take the USB cable that came with your MP3 player and plug the small end into the player and the larger end into a USB port on your computer. Your computer should recognize the device as a removable disk. - Access Your MP3 Player on the Computer
Once the MP3 player is connected, it should appear on your computer. On Windows, it might show up under ‘This PC’ or ‘My Computer.’ On a Mac, it should appear on the desktop or in ‘Finder.’ - Open the Music Folder on Your MP3 Player
Double-click the MP3 player’s icon to open it and look for the music folder. This folder is typically named “Music,” but it can vary depending on the brand and model of your MP3 player. - Transfer Music Files
You can now begin transferring your music. You can do this by either dragging and dropping the files from your computer to the MP3 player’s music folder or by copying and pasting them into the folder. - Safe Eject Your MP3 Player
Once the transfer is complete, it’s crucial to safely eject the MP3 player to avoid data corruption. On a Windows computer, you can do this by right-clicking on the MP3 player’s drive letter and selecting ‘Eject.’ On a Mac, drag the MP3 player’s icon to the ‘Trash,’ which will change to an ‘Eject’ icon. - Disconnect the MP3 Player
After safely ejecting the MP3 player, you can unplug the USB cable from your computer and the MP3 player. - Enjoy Your Music
Now that your music is on your MP3 player, you are ready to listen to it. Navigate to the music section on your MP3 player and select a song to enjoy!
Summary
Transferring music from a computer to an MP3 player using a USB cable is an excellent solution for beginners who already have a collection of digital music. It is a quick, straightforward process that involves no additional costs. The primary benefit of this method is the ease of use and the ability to transfer multiple files at once. A potential downside is the necessity of having a computer and understanding basic file management, but these skills are minimal and easily mastered. Furthermore, always remember to handle your MP3 player and any cables gently to avoid damaging the device or the music files you are transferring.
Using a Download Manager Software
Introduction
Downloading music to an MP3 player may seem like a daunting task for beginners, but the use of a download manager software can simplify the process and enhance the experience. A download manager is a program designed to facilitate the downloading of files from the internet. It offers features like pausing and resuming downloads, handling multiple file downloads simultaneously, and even increasing download speeds. By using a download manager, you can more efficiently manage your music downloads and ensure that your favorite tunes are easily transferred to your MP3 player.
Steps
- Choose a Download Manager:
Research and select a reliable download manager software that’s compatible with your computer’s operating system. Popular options include Free Download Manager, Internet Download Manager, and JDownloader. - Install the Software:
Download the setup file from the official website of the chosen download manager. Open the file and follow the on-screen instructions to install the software on your computer. - Familiarize Yourself with the Interface:
Launch the download manager and take some time to explore its interface. Look for areas where you can adjust settings, view your download list, and manage downloaded files. - Configure Settings:
Adjust the settings according to your preferences. This could include setting download speed limits, selecting a default folder for downloaded music files, and choosing notifications for when downloads are complete. - Find Music Files to Download:
Go to online music stores or websites where you can purchase or freely download music legally. When you find a song or album you want to download, copy the download link from the website. - Use the Download Manager to Download Music:
In the download manager, click on the option to add a new download, which will usually prompt you to enter the copied download link. Some managers may offer browser extensions that allow you to download directly from the webpage. - Monitor Your Downloads:
Watch the progress of your downloads within the download manager. Here you can pause, resume, or cancel downloads as needed. - Locate the Downloaded Files:
Once the downloads are complete, navigate to the folder you set as the default download location, and you should see your new music files there. - Transfer Music to Your MP3 Player:
Connect your MP3 player to your computer using a USB cable. Your MP3 player should appear as a removable disk. Open it and navigate to its music folder. - Copy Files to MP3 Player:
Drag and drop your downloaded music files from the computer’s folder to the MP3 player’s music folder. Ensure that the transfer is complete before disconnecting the MP3 player. - Safely Disconnect the MP3 Player:
Before unplugging the USB cable, safely eject the MP3 player from your computer to prevent any file corruption.
Summary
The benefits of using a download manager for downloading music are numerous. You can handle large quantities of downloads without having to monitor each one closely, you can manage any interruptions in your internet connection without losing the progress of your downloads, and you can keep all your downloaded music in one organized place before transferring it to your MP3 player.
However, the potential downsides are that it requires an initial setup and some learning time to familiarize yourself with how the software works. You will also need to ensure you’re using legitimate websites to obtain the music, as the download manager itself does not discriminate between legal and illegal sources.
In conclusion, using a download manager when downloading music to your MP3 player can streamline the process, saving time and potentially improving your overall experience. With careful selection of both the download manager and the music source, you can build your music library efficiently and reliably.
Solution 9: Download from Cloud Storage
Introduction
In the age of the internet, cloud storage has become a virtual ‘hard drive’ that we can access from anywhere in the world, provided we have an internet connection. Services like Google Drive, Dropbox, OneDrive, and others offer users the ability to store a wide array of files, including music. If you’re someone who prefers keeping their audio collection backed up in the cloud, this guide will help you understand how you can download your music from cloud storage services directly to your computer, and then transfer those tunes onto your MP3 player. This method is perfect for ensuring your favorite music is always available, regardless of internet connectivity.
Steps
Downloading Music from Cloud Storage to Your Computer:
- Accessing Cloud Storage:
- Choose the cloud storage service where your music is stored like Google Drive, Dropbox, or another service.
- Open a web browser on your computer and go to the cloud service’s website.
- Sign into your account using your username and password.
- Navigating to Your Music Folder:
- Once logged in, navigate through your stored files and locate the folder where your music is stored.
- If your music is not organized into a folder, take some time to search or sort your files to find the music files you wish to download.
- Selecting Files to Download:
- Click to select individual music files, or press and hold ‘Ctrl’ on your keyboard (or ‘Command’ on a Mac) to select multiple files.
- If you have a whole folder of music, you might be able to download the entire folder, depending on your cloud service.
- Initiating the Download:
- Right-click on the selected files or folder and choose the ‘Download’ option, or look for a download button/icon in the service’s user interface.
- If prompted, choose where on your computer you want to save the music files. Select a location that’s easy to remember, like your desktop or a specific ‘Music”folder.
- Downloading and Extracting:
- Your browser will start downloading the selected files or folder. If it’s a folder, or multiple files, they may be compressed into a ZIP file.
- Once the download is complete, navigate to the downloaded ZIP file (if applicable), right-click it, and choose ‘Extract All” to unzip the files into a regular folder on your computer.
Transferring Music from Your Computer to Your MP3 Player:
- Connecting Your MP3 Player:
- Connect your MP3 player to your computer using the MP3 player’s USB cable.
- Wait for the computer to recognize the device. It may appear as a new drive letter or under ‘Devices and drives’ in ‘This PC’ on Windows, or on the desktop on a Mac.
- Transferring files:
- Open the folder where you downloaded and extracted your music files.
- Open the MP3 player’s folder in another window; it should be visible once the MP3 player is connected.
- Drag and drop your selected music files from the computer’s folder to the MP3 player’s folder. Ensure you’re placing them in the appropriate music or media folder on the MP3 player.
- Safely Eject Your MP3 Player:
- Once the transfer is complete, safely eject the MP3 player by clicking ‘Eject’ next to the MP3 player’s drive on your computer, or dragging the drive to the Trash on a Mac which will turn into an ‘Eject’ icon.
- Unplug the USB cable from your MP3 player and your computer.
Summary
Downloading music from cloud storage to your MP3 player is a smooth and efficient process, especially for those who already have their music collections backed up online. It’s convenient, as you can access your files from anywhere and keep a backup in case of device failure. The primary benefits of this method include accessibility of your files and the reassurance that the music quality will be as good as the files you’ve uploaded. However, this process does require a computer as an intermediary and can be dependent on your internet connection speed. Additionally, you should be mindful of the storage limit of your cloud service to avoid potential additional costs for extra storage space. Overall, this solution bridges the gap between modern cloud-based storage and traditional MP3 players, ensuring your favorite tunes are always at hand.
Solution Name: Recording Streaming Music
Introduction
In today’s digital age, we have access to an expansive universe of music through various streaming platforms. Though many people enjoy streaming music online, there may be times when you want to have certain songs available to play offline on an MP3 player—especially in situations where internet access is limited. Recording streaming music is a method that can capture audio from the internet and save it as an MP3 file, which you can then transfer to an MP3 player. This technique harkens back to older times when people recorded songs from the radio onto cassettes, but now is done with software on your computer. It’s a creative solution that can be particularly useful when dealing with music that’s not easily available for download.
Steps
To record streaming music and transfer it to your MP3 player, follow these detailed steps:
- Research and Choose Audio Recording Software:
Begin by finding a reliable audio recording program that is compatible with your computer’s operating system. There are many options available, from freeware to paid software, such as Audacity (free), Adobe Audition (paid), or other similar audio recording applications. Read user reviews, and consider the ease-of-use for a beginner. - Install Audio Recording Software:
Download the installer for the chosen software from the official website or a trusted source. Double-click the installer file and follow the prompts to install it on your computer. Be attentive during the installation process to avoid installing undesired additional software or toolbars that sometimes come bundled with free software. - Set Up the Software:
Launch the audio recording software and familiarize yourself with its interface. You may need to configure the input source to ensure that the software records the audio streaming from your computer and not external sounds, like your microphone. Set the recording quality, which ideally should be 320 Kbps for the best MP3 quality or a minimum of 128 Kbps for acceptable audio quality. - Prepare to Record:
Open the streaming service or website where you will play the music you want to record. Cue up the song or playlist and make sure it plays correctly through your computer’s speakers or headphones. - Record the Music:
Return to the audio recording software and click on the record button (usually a red circle). Quickly switch back to the streaming service and start playing the music. The software will record the audio output in real-time. Ensure an ambient noise-free environment for the best quality if internal recording is not an option. - Stop the Recording:
After the song or playlist has finished playing, switch back to the audio recording software and click the stop button (usually a square symbol). Save the recording in MP3 format. Some software may allow you to edit the recording to trim unwanted parts at the beginning or end of the track. - Transfer to MP3 Player:
Connect your MP3 player to the computer using a USB cable. Once detected, it will typically appear as a removable storage device. Copy the newly recorded MP3 files from your computer and paste them onto your MP3 player’s music folder. Safely eject the MP3 player once the transfer is complete.
Summary
Recording streaming music is a handy way to capture and enjoy your favorite songs offline on an MP3 player. This method offers the flexibility of creating your unique audio collection from various sources, including internet radio stations and streaming platforms that do not offer direct download options. The benefits include having personalized playlists and the ability to listen to music without needing internet access.
A potential downside is that the process requires a bit of setup and real-time recording, which can be time-consuming. Additionally, the legality of recording streaming music can be complex and can vary based on the copyright laws in your country, so it is important to stay informed and ensure you’re respecting artists’ and copyright holders’ rights.
Remember to consider the ethics and legality of recording streaming music, and enjoy building your music library for your MP3 player.
Conclusion
Congratulations on taking your first steps into the world of portable music! With your MP3 player now brimming with your favorite tunes, you’re ready to take your music with you wherever you go. Remember, downloading music is just the beginning—your MP3 player can be the key to discovering new artists and genres. Keep exploring and updating your playlists to keep the soundtrack to your life fresh and exciting. Happy listening!
FAQs
Q: What formats can I download music in for my MP3 player?
A: Most MP3 players support various formats such as MP3, WMA, WAV, and AAC. It’s best to consult your device’s specifications for compatible formats.
Q: Can I download music directly from the internet to my MP3 player?
A: This depends on your MP3 player’s capabilities. Some players allow direct downloads, while others may require you to download to a computer first and then transfer the files.
Q: How can I transfer downloaded music from my computer to my MP3 player?
A: Typically, you can connect your MP3 player to your computer using a USB cable. Once connected, you can drag and drop the downloaded music files into your player’s music folder.