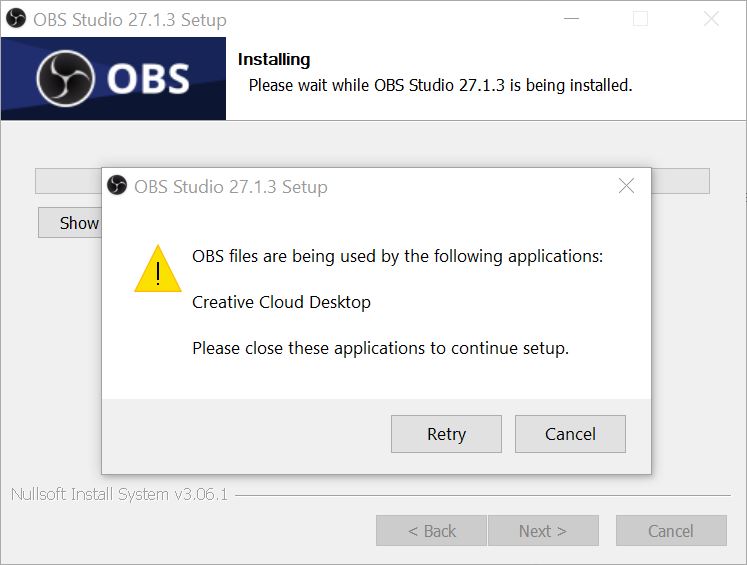
In the exhilarating world of content creation, the battle for supremacy is ever-raging between two formidable giants: OBS and Adobe Creative Cloud. You’ve meticulously recorded your masterpiece using OBS (Open Broadcaster Software), only to encounter the dreaded message that your files are currently held hostage by Creative Cloud. It’s the showdown of the century, and your precious content is caught in the crossfire.
But fear not, intrepid creator, for we are about to embark on a journey through the labyrinthine world of digital content, armed with the knowledge and solutions needed to reclaim your OBS files from the clutches of Creative Cloud. In this article, we’ll unravel the mysteries, debunk the myths, and unveil the secrets of harmoniously using these two powerful tools. Whether you’re a seasoned content creator or just starting your journey, this guide is your passport to seamless creative expression.
So, tighten your seatbelts, because we’re about to dive into the heart of the battle, where OBS and Creative Cloud meet head-on. Get ready to liberate your files and supercharge your creative endeavors, as we explore the fixes that will make your creative workflow a breeze.
Why OBS Files are Being Used by Creative Cloud
OBS files being used by Adobe Creative Cloud can be a source of frustration for many content creators and editors. This unexpected interaction between these two software packages can occur due to several reasons:
- Automatic Import Settings: Adobe Creative Cloud applications, such as Adobe Premiere Pro and Adobe After Effects, often have automatic import settings enabled. When you place OBS files in a folder monitored by Creative Cloud, it might automatically recognize them as media assets to be included in your projects.
- File Extensions: OBS typically saves recordings in formats like FLV, MKV, or MP4. These are common video file formats that are also compatible with Creative Cloud software. When Creative Cloud scans for media files, it may detect and attempt to use OBS files without your explicit consent.
- Synced Folders: If you have your OBS recording folder set to sync with Adobe Creative Cloud, any new files added to that folder will be automatically uploaded to the cloud and could potentially be imported into Creative Cloud applications.
- Folder Organization: Sometimes, OBS files might be stored in folders alongside other media assets, leading Creative Cloud to assume they are part of your ongoing project.
While these situations can lead to OBS files being used by Creative Cloud, it’s important to note that this behavior can vary based on individual settings, configurations, and versions of both OBS and Creative Cloud applications.
Fixes to OBS Files are Being Used by Creative Cloud
With the following provided methods you can fix this issue,
Force Close the CC Apps
- Right click on your window’s start icon on your PC and click task manager
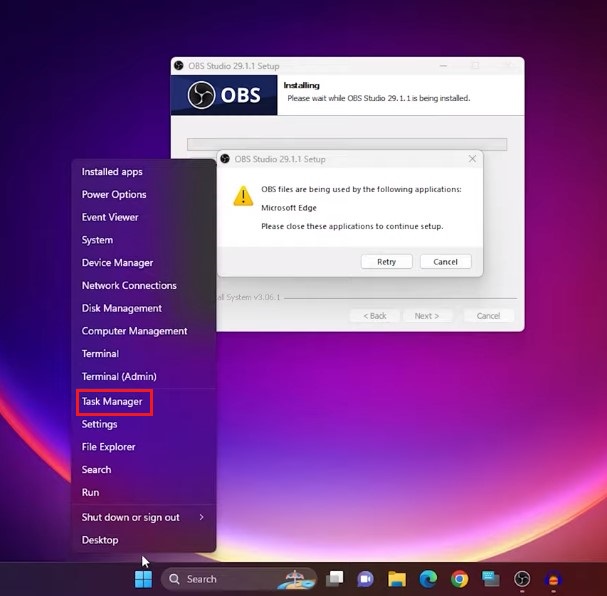
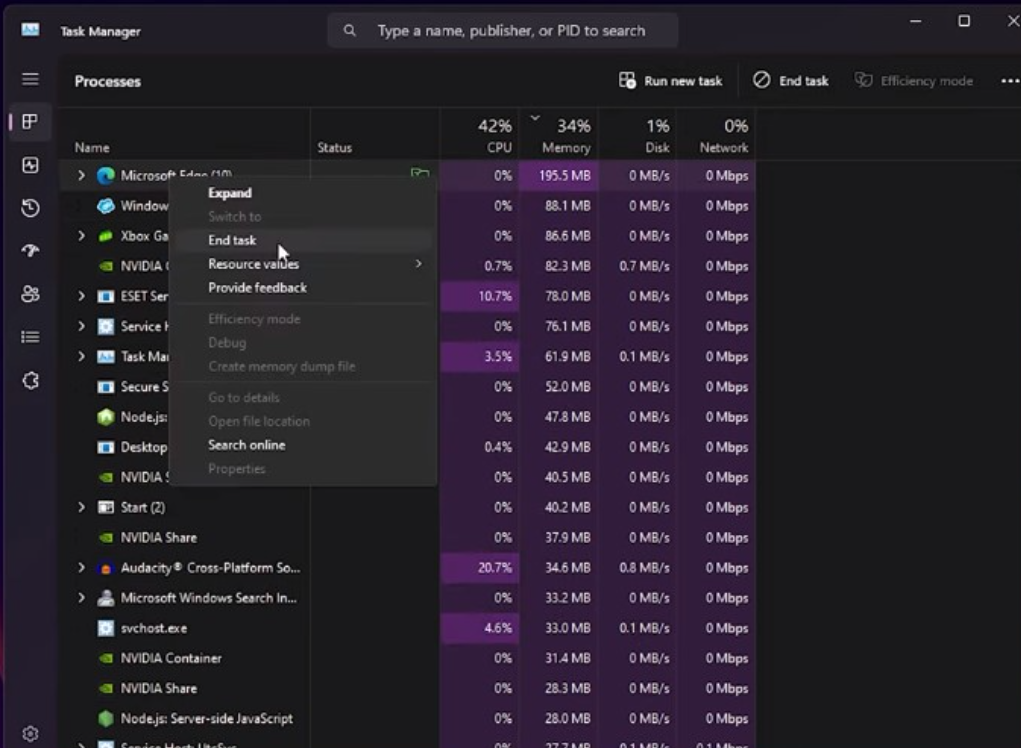
- Your task manager will be as shown below
- You need to force close the CC apps. Look in the task manager / process and you’ll see a lot of Adobe processes.
- If not, then look for Microsoft Edge, and end this task as shown below.
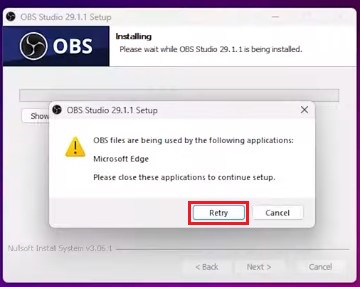
- Click on the Retry and your error will be fixed as shown
Note: if this fix doesn’t clear your issue then you need to carry out the following processes. Otherwise, you don’t need to follow the further methods.
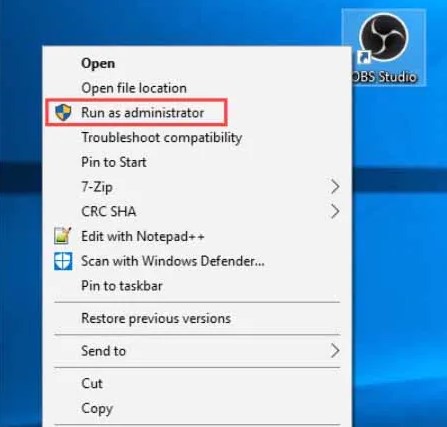
Perform Administrator Run on OBS
To harness the true power of OBS, it’s imperative to run it with administrative privileges. By doing so, you unlock its full potential, ensuring smoother performance and addressing common issues like the notorious black screen or unexpected crashes.
Keep Windows and Software Updated
Neglecting updates can lead to software glitches and performance issues. Here’s how to address it:
- Access Device Manager: Open it by searching “Device Manager” or right-clicking the taskbar and selecting it.
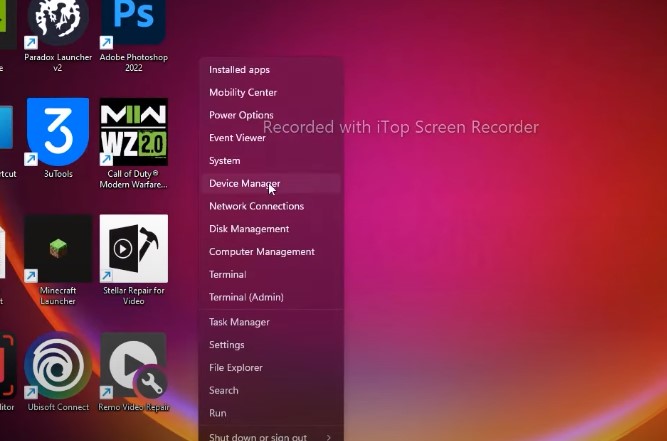
- Find Your Application: Locate the one you want to update, click its icon.
- Update the Driver: Right-click the driver’s name and select “Update Driver.”
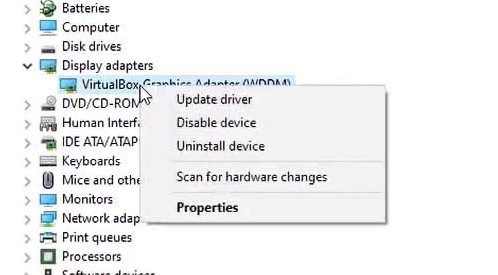
- Update Method: Choose automatic for hassle-free updates. If needed, manually download and select the driver from local storage.
These steps ensure your system and applications, including OBS, stay up to date for optimal performance.
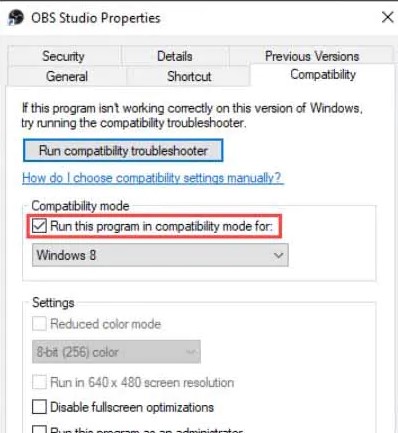
Activate Compatibility Mode for OBS
Enabling compatibility mode can resolve the vexing issue of a black screen when launching OBS for online streaming. This problem arises when OBS isn’t perfectly harmonized with all other running applications on your system. To tackle it, follow these steps:
- Locate OBS Studio: Right-click on the OBS Studio app icon in its installed location.
- Access Properties: In the context menu that appears, click on “Properties.”
- Compatibility Tab: In the new dialog box, navigate to the “Compatibility” tab, positioned in the second row from the top.
- Check Compatibility Mode: Ensure that the “Run this program in compatibility mode for” checkbox is selected.
- Apply and Confirm: Click the “Apply” button at the bottom and then hit “Ok.”
- Reboot and Verify: After rebooting your system, check if the OBS Studio black screen issue is resolved.
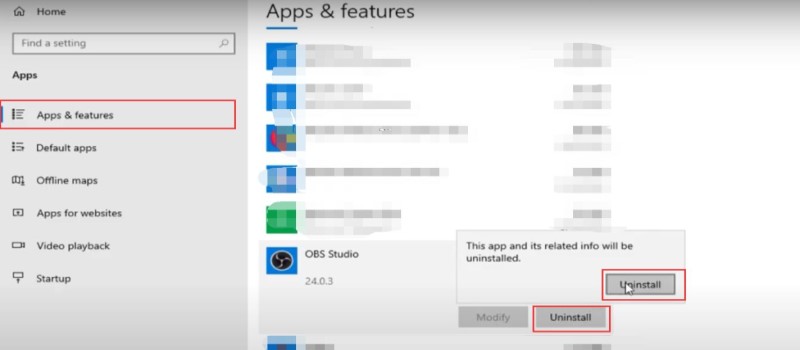
Reinstalling OBS Studio: A Last Resort
When all else fails, and your OBS Studio issues refuse to budge, the final option is to reinstall the application. Sometimes, a flawed installation can be at the root of your problems, and since OBS Studio is open-source, premium customer support isn’t available.
Here’s how to reinstall OBS Studio:
- Uninstall OBS Studio: Open the Control Panel, go to “Programs and Features,” select OBS Studio, and click the “Uninstall/Change” button at the top. Follow the on-screen instructions to completely remove it. Or you can also go to Apps & Features through your start menu and uninstall it as shown below.
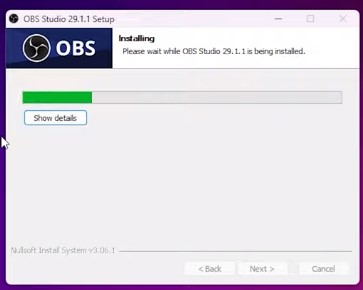
- Download OBS Studio: Open your preferred web browser and go to obsproject.com. On the page, select your operating system from the three available tabs and start the download.
- Installation: Once the file is downloaded, open it and follow the on-screen instructions to install OBS Studio successfully. Ensure you grant all necessary permissions during the installation process.

- Optional Plugins: During installation, you may be asked if you want to install additional plugins. Leave these boxes unchecked if you don’t need them.
- Finish: Finally, click “Finish” to complete the installation successfully.
Conclusion
In the dynamic world of content creation, the clash between OBS and Adobe Creative Cloud can often lead to exasperation when OBS files unexpectedly fall under Creative Cloud’s control. However, we’ve distilled a set of concise solutions to this predicament.
Firstly, you can swiftly address the issue by force-closing Creative Cloud applications through the Task Manager. This quick fix can help regain control over your OBS files promptly.
For a more comprehensive solution, consider administering OBS with elevated privileges. Running OBS with administrative rights not only enhances its performance but also effectively tackles common issues that creators may encounter. To ensure a smooth creative workflow, it’s imperative to keep both your Windows operating system and software applications updated. Regular updates are key to preventing glitches and optimizing performance.
As a last resort, should other methods fail, consider a complete reinstallation of OBS Studio. This clean slate can potentially resolve any persistent issues you may be facing.
Your valuable feedback matters greatly to us. If you’ve grappled with OBS files being claimed by Creative Cloud, please share your experiences in the comments section. Your insights can prove invaluable to fellow creators in navigating this challenge and achieving seamless creative expression. Together, we empower the creative community to conquer obstacles on the path to realizing their artistic visions.
Frequently Asked Questions
Why is OBS not working properly?
OBS may not launch due to various reasons, including insufficient memory space, high CPU or GPU usage, hardware driver issues, or software corruption, especially if it previously crashed.
Why is my OBS not opening?
If OBS won’t open on Windows 10/11, ensure you have sufficient free disk space and available RAM. Clean up your system’s resources and try launching OBS again.
Where are OBS Studio files stored?
On Windows, OBS recordings are typically saved in the Video folder, while on Mac, they are stored in the Movies folder. You can also find OBS recordings by clicking “File” and selecting “Show Recordings” in OBS Studio.
How do I completely close Adobe Creative Cloud?
To exit Creative Cloud on Windows, select “Exit Creative Cloud” from the File menu or press Ctrl+W, then confirm by selecting “Quit.”
Can I delete Creative Cloud files locally?
Yes, you can delete the local Creative Cloud files folder by navigating to your Windows user directory and right-clicking to delete it. Note that the shortcut to the folder may remain in Windows File Explorer.
Where are Creative Cloud files stored?
On Windows, you can find a “Creative Cloud Files” folder under X:/Users/<USERNAME> (where X is your hard drive). On Mac, it’s located under Mac HD/User/<user>.
What are Creative Cloud synced files?
Creative Cloud synced files are those saved on local devices in a folder called “Creative Cloud Files.” These files can be synchronized (copied) to your cloud storage through a process running on your device.
Is OBS offline?
OBS (Open Broadcaster Software) is a free and open-source solution for offline video recording and live streaming, compatible with both Mac and Windows.
Will uninstalling Creative Cloud delete files?
Uninstalling Creative Cloud won’t delete files you’ve created using it. You can reinstall the Creative Cloud desktop app if needed.
What happens to my files if I cancel Adobe Creative Cloud?
When you cancel Adobe Creative Cloud, you’ll lose access to files saved exclusively on Adobe’s cloud servers. Make sure you have backups on storage you control.
What is Creative Cloud file storage?
Creative Cloud file storage syncs your files, folders, Creative Cloud Libraries, and assets across connected devices via your Creative Cloud account. Files in your Creative Cloud Files folder are automatically synced to the Creative Cloud website.
How do I stop Creative Cloud from syncing files?
You can pause or resume file sync in the Creative Cloud desktop app by selecting the Cloud activity icon in the upper right, then clicking the gear icon to access preferences.
Is OBS safe for PCs?
OBS is safe to use if downloaded from the official OBS website. However, it may not be suitable for all screen-recording needs, particularly those involving online games with anti-cheating systems. For such cases, Movavi Screen Recorder is recommended.